How to Create a Client Onboarding Guide That Streamlines Your Design Projects
What to Include in a Project Onboarding Guide
When a client signs the contract and pays their deposit, you might be tempted to jump straight into the creative work—but don’t skip the onboarding step. A solid Project Onboarding Guide sets the tone for a smooth project, keeps communication clear, and shows your clients you’ve got everything under control.
This blog post walks you through the key sections to include in your onboarding documents so you can lead your clients confidently from day one.
What Is Project Onboarding?
Client onboarding is the bridge between a signed contract and the start of creative work. While your client likely understands what they’re getting from your proposal, they may still have questions about how everything will unfold.
A great onboarding guide answers their questions before they even ask, giving them clarity, confidence, and a professional experience.
Where Does the Onboarding Guide Fit?
Think of it as the final prep stage before the project officially begins. It typically comes after:
Service & Pricing Guide
Project Proposal
Contract Signed + Deposit Paid
Onboarding Guide
What to Include in Your Onboarding Guide
A strategic onboarding guide helps your client feel supported and gives them a roadmap for what's ahead. Here’s a detailed breakdown of what to include and why each section matters:
1. Welcome & Guide Overview
This sets a professional but warm tone for your working relationship. Many clients feel nervous at the start—this reassures them they’re in good hands.
Include:
Personal Welcome Message – A short, friendly intro (ideally written in your brand voice). Let them know you're excited to work together.
What the Guide Is For – Clarify that this is their reference for how the project will run.
How to Use It – Brief instructions on what to read first, what’s most important, and when to revisit it.
Contact Details – Share your preferred contact method and response time so expectations are clear upfront.
2. Branding Process Breakdown
Even if your proposal outlined the steps, this section reinforces the timeline and helps the client see the bigger picture again.
Include:
Step-by-Step Process Overview
Format of Communication – Will reviews be done over Zoom? Loom? Email? This helps clients prepare.
What Files They’ll Receive at Each Stage – Let them know when they’ll see mockups, proofs, etc.
Client Tasks or Approvals – Highlight their involvement, so they know when you'll need their input to keep the project on schedule.
3. Deliverable Details
Help your client understand the deliverables—not just what they are, but how to use them confidently.
Include:
List of Final Deliverables – E.g. logo suite, brand guidelines, templates, social media assets, etc.
Formats Provided – EPS, PDF, PNG, JPG? Explain file types in simple terms so your client knows what to use where.
Usage Recommendations – Clarify how different deliverables are intended to be used (e.g. web vs. print).
Access Instructions – Let them know how they’ll receive the files (via Dropbox, client portal, etc.) and for how long they’ll have access.
4. Programs & Tools Used
Prepping your client for the tools you’ll use reduces confusion and delays. It also helps avoid awkward surprises.
Include:
List of Design or Communication Tools – E.g. Notion, Figma, Miro, Adobe Express, Asana.
Login or Sign-Up Requirements – Let them know if they'll need to create accounts.
Memberships or Permissions Needed – Especially if they’re using templates or shared platforms.
How Files Are Delivered or Reviewed – Do they need to know how to leave feedback on PDFs, comment in Google Docs, or use an online portal?
5. Client’s Next Steps
This is one of the most important sections—it gives your client clear actions to take right away to move things forward.
Include:
Link to Client Portal – Centralise all your communication, files, and deadlines.
“Homework” or Pre-Work – Do they need to complete a brand questionnaire? Gather references or brand assets?
Tutorials or Helpful Resources – Short screen recordings, Loom videos, or written instructions can make this part easier.
Support Options – Let them know how to reach you if they get stuck—email, portal, Slack, etc.—and when they can expect a response.
Why It’s Worth the Effort
Creating a Project Onboarding Guide might feel like extra work, but it can save you hours of client communication and repeated questions. Plus, it shows your clients they’re in expert hands—boosting their trust in your process from the very beginning.
Want to make it easy?
You can grab my Onboarding Guide Template for Adobe InDesign and Illustrator below! It’s professionally designed to walk your clients through the entire project process with clarity and ease. From welcome messages to next steps, this template helps you look polished, stay organised, and deliver an exceptional client experience. Be sure to explore the Design Shop for more ready-to-use templates and freebies that will help you run your business like a pro.

Onboard Your Clients Seamlessly with a Professional Onboarding Guide
Create an unforgettable first impression and set every project up for success with this easy-to-use Client Onboarding Guide Template.
Designed specifically for brand designers, freelancers, and creative studios, this guide helps you introduce your process, answer client questions, and kick off projects smoothly — without overwhelming email chains or endless back-and-forth.
Fully editable in Adobe InDesign, Illustrator, Canva, and Adobe Express, it's built to save you time, impress clients, and streamline your workflow.
What’s Included:
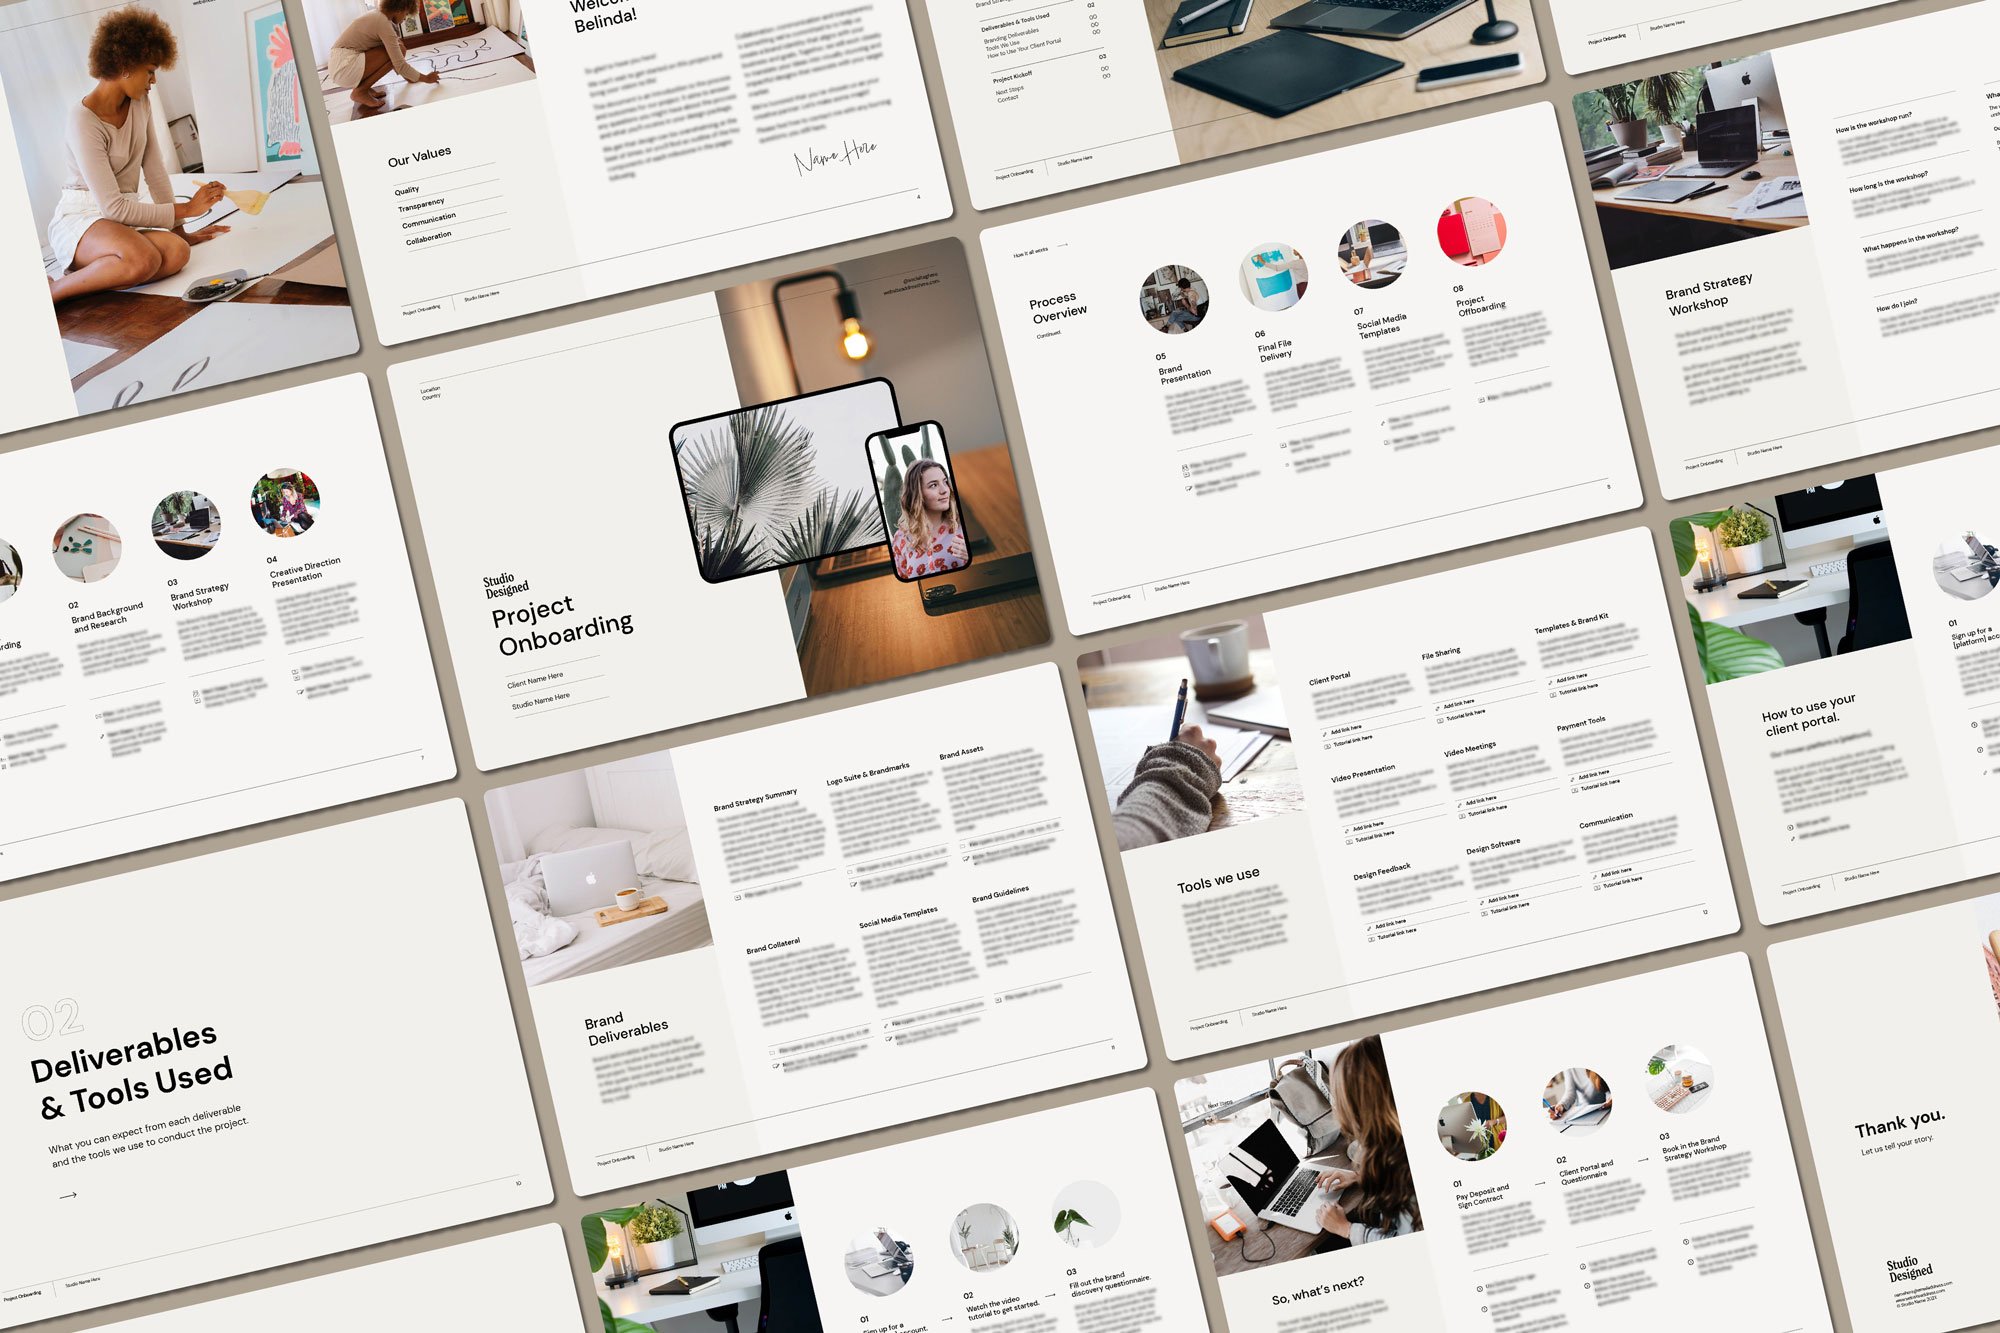
✔ 16 professionally designed pages (A4 size — 297mm x 210mm, RGB)
✔ 3 fully customizable sections:
Process Overview — Walk your clients through your design process, from kickoff to delivery
Deliverables & Tools Used — Explain what clients will receive and the platforms you’ll use
Project Kickoff — Help clients prepare for a smooth, successful project launch
✔ Layout options for multiple cover designs
✔ Real content examples from a working freelance branding process, including:
Brand design process breakdown
Brand Strategy Workshop FAQ
Branding Deliverables FAQ
Tools Used FAQ
How to use your client portal
Next steps guide
✔ Preview PDF for easy reference
✔ User Guides for Ai & Id, Canva and Express
✔ Terms and Conditions page template
Key Features:
Fully customisable in Adobe InDesign, Illustrator, Canva, and Adobe Express
Professional yet approachable design — adaptable to fit any brand style
Based on real-world agency and freelance processes
Saves hours of admin time by answering common client questions upfront
Builds trust, sets clear expectations, and enhances your overall client experience
Perfect For:
Freelance brand designers
Web designers and creative studios
Service providers who want to polish their onboarding process
Designers ready to elevate their client experience
Why You’ll Love It:
This onboarding guide helps you stop wasting time explaining your process over and over — and start welcoming clients into a clear, confident, and exciting project journey.
First impressions matter. Set yourself apart as a professional from day one.
Final Thoughts
A thoughtful onboarding experience can completely change the way your clients feel about working with you. It builds trust, reduces confusion, and sets a solid foundation for the entire project. Whether you’re just starting out or looking to refine your client experience, a well-crafted onboarding guide is one of the most valuable tools you can add to your process.
Want More Time-Saving Tools and Freebies?


This process is just one of the techniques I share across my design templates and digital assets, made especially for designers who want professional results—without starting from scratch every time.